
How to Install a Mileage Blocker: A Complete DIY Guide
Learn how to install mileage blocker modules with our complete DIY guide. Get step-by-step instructions for a safe, seamless, plug-and-play installation.
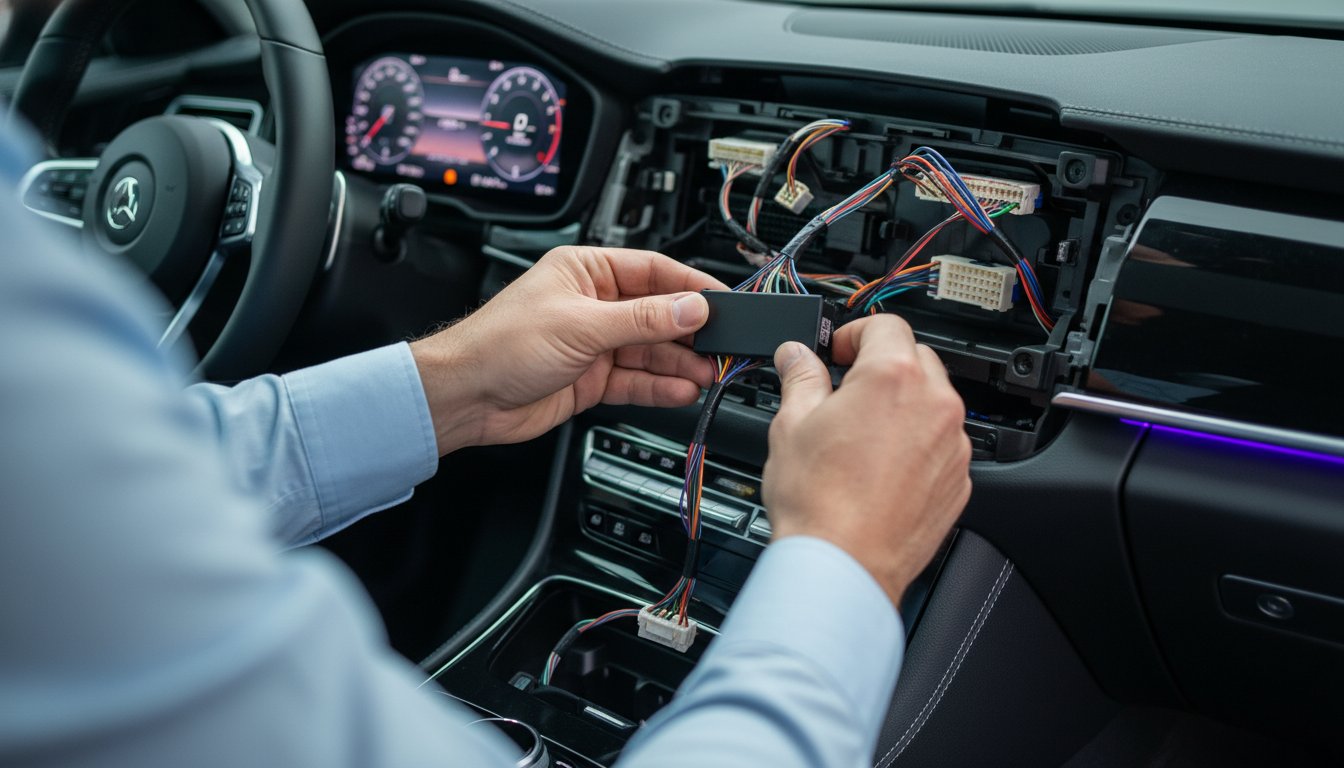
The thought of modifying a modern vehicle's complex electronics can be intimidating. Concerns about causing damage, voiding your warranty, or simply not knowing where to begin are valid. However, installing a premium-quality mileage blocker is a straightforward process when you have the right instructions. This guide is designed to eliminate that uncertainty, providing a direct, professional walkthrough on how to install mileage blocker modules that are engineered for seamless integration with your car's CAN-Bus system.
Follow along as we detail the entire procedure, from the necessary pre-installation checks to the final post-installation testing. You will learn how to safely access the connection point, correctly attach the genuine plug-and-play connectors, and verify that all functions are operating perfectly. By the end of this guide, you will have the confidence and knowledge to complete the installation yourself, ensuring your device is ready for its intended testing or off-road use.
Before You Begin: Essential Pre-Installation Checks & Tools
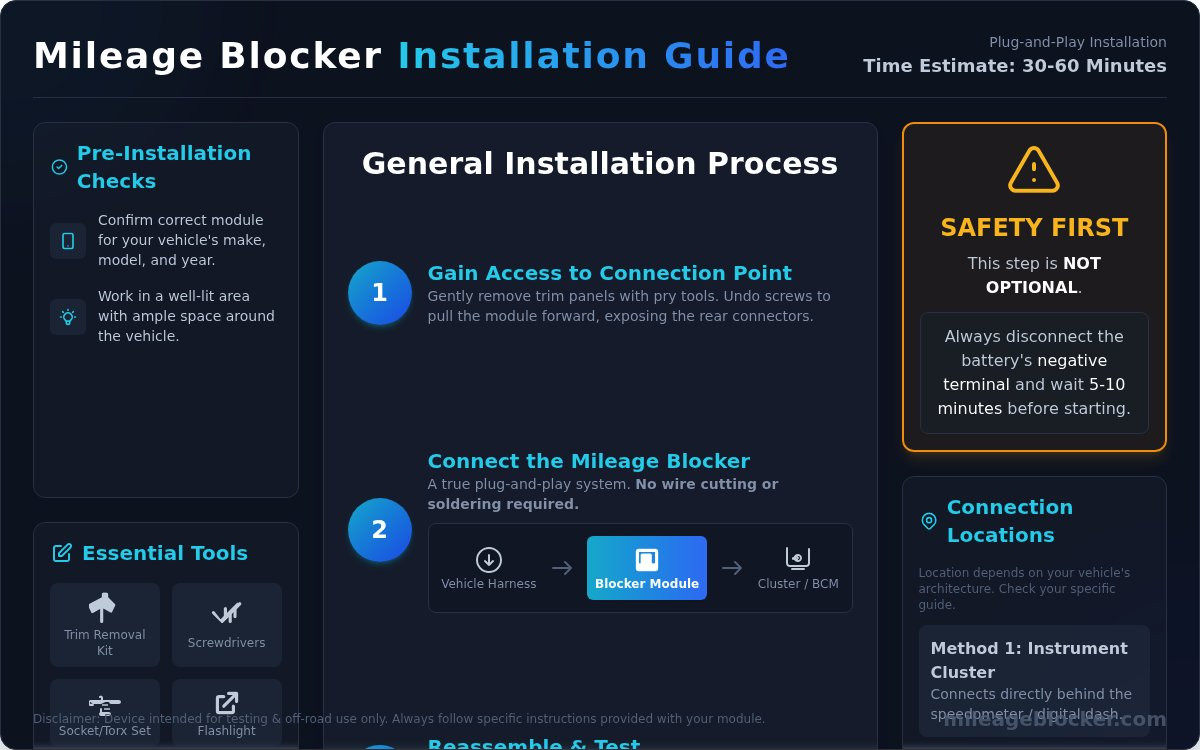
Proper preparation is the most critical step for a seamless and successful installation. Before you learn how to install mileage blocker modules, taking a few moments to perform these pre-installation checks will prevent common issues and ensure the process is efficient. First, confirm you have the correct mileage blocker specifically designed for your vehicle's make, model, and year. Using the wrong module can lead to compatibility issues with your car's CAN-Bus or FlexRay systems.
Please note that this is a general guide. While the core principles are universal, every vehicle is different. Always prioritize the specific instructions provided with your premium quality mileage blocker. It's also crucial to be aware of the legal and ethical framework surrounding odometer readings. For a comprehensive background, understanding odometer fraud provides essential context. For most vehicles, the entire process should take between 30 and 60 minutes. Always work in a well-lit area with enough space to open the car doors fully for unobstructed access to the dashboard.
Gathering Your Essential Tools
Having the correct tools on hand makes the installation process significantly easier and prevents damage to your vehicle's interior. This principle holds true for any technical hobby where precision matters, and enthusiasts often turn to specialized suppliers like Lockpick Pros for the right equipment. You will likely not need every tool listed, but it is best to have them available.
The skills used here, from handling delicate parts to understanding wiring, are transferable to other intricate hobbies. For those who enjoy this type of detailed work, you might also be interested in the world of model railways; you can check out Narrow Minded Railworks to see some of the complex kits available.
This appreciation for quality materials and craftsmanship often extends beyond electronics. For those who value premium, handcrafted goods for their lifestyle or vehicle, you can learn more about Laveri Leather Store.
- A non-marring plastic trim removal tool kit: This is highly recommended to safely pry open dashboard panels and covers without scratching or breaking delicate plastic clips.
- Screwdrivers: A basic set of Phillips and flathead screwdrivers will be necessary for removing screws that secure the instrument cluster or surrounding trim.
- Socket or Torx Driver Set: Some vehicle models, particularly from European manufacturers, use Torx screws. A small set of T-drivers (e.g., T20, T25) or sockets may be required.
- Flashlight or Headlamp: The area behind the instrument cluster is often dark and difficult to see. A good light source is essential for locating the correct connectors.
Safety First: Disconnecting the Vehicle's Battery
This step is not optional; it is a mandatory safety precaution. Before beginning any work on your vehicle's electronics, always disconnect the negative terminal of your car battery. This simple action prevents the risk of electrical shorts, which can damage sensitive electronic control units (ECUs) and other modules. After disconnecting the terminal, wait for 5-10 minutes. This allows any residual power stored in the system's capacitors to fully discharge, creating a safe working environment and protecting your vehicle's sophisticated electronics.
Locating the Connection Point: Instrument Cluster vs. CAN Gateway
A key feature of our mileage blockers is their straightforward, plug-and-play installation. We utilize genuine automotive-grade components and original OEM plug connectors, which means there is absolutely no need for wire cutting or soldering. The first step in understanding how to install mileage blocker modules is identifying the correct connection point in your vehicle. This location is determined by your car’s specific electronic architecture and CAN-Bus system.
While your specific product page will have a detailed video guide showing the exact location, the installation will follow one of two primary methods.
Method 1: Behind the Instrument Cluster (Speedometer)
For a large number of vehicle models, the mileage blocker connects directly to the back of the instrument cluster, also known as the speedometer or digital dash. This process involves the careful removal of dashboard trim pieces to access and unmount the cluster. The module is then installed in-line by unplugging the main harness from the cluster, connecting it to the blocker, and then plugging the blocker’s harness back into the cluster. This creates a seamless and reversible connection.
Method 2: At the CAN Gateway or Body Control Module (BCM)
Modern vehicles, particularly those with complex, decentralized electronic systems, often require the module to be installed at a central communication hub like the CAN Gateway or Body Control Module (BCM). These modules are typically located in more accessible areas, such as behind the glove box, under the steering column near the OBD-II port, or in the passenger-side footwell. A significant advantage of this method is that it often eliminates the need to remove the instrument cluster, simplifying the installation process.
Before proceeding with either installation method, it is crucial to understand the intended purpose of this device for vehicle testing and off-road use only. Altering an odometer for fraudulent purposes is illegal. For a comprehensive overview of the regulations, you can review the official Federal laws and penalties to ensure full compliance. Our detailed guides ensure you know exactly how to install mileage blocker hardware correctly and efficiently for its intended, legitimate applications.
The General Installation Process: A Step-by-Step Walkthrough
Our mileage blockers are engineered for a straightforward, plug-and-play installation that requires no cutting or soldering of wires. This walkthrough provides a general overview of the process. While the physical steps are simple, it's critical to remember these devices are intended for legitimate testing and off-road applications only. Misrepresenting a vehicle's mileage is a serious crime, and you should be familiar with the federal law on odometer fraud before proceeding. For a successful installation, always work slowly, never force plastic components, and take photos at each stage to simplify reassembly.
Step 1: Gaining Access to the Connection Point
The first objective is to access the rear of the module where the blocker will be connected, which is typically the instrument cluster or Body Control Module (BCM). Begin by using a set of plastic pry tools to gently unclip and remove any surrounding dashboard trim panels. Once the trim is off, identify and undo the screws or bolts that secure the module in place. With the fasteners removed, carefully pull the module forward just enough to reach the wiring harnesses and connectors on the back.
Step 2: Connecting the Mileage Blocker
This step is the core of how to install mileage blocker modules. With the back of the module exposed, identify the correct OEM plug specified in your vehicle-specific instructions. To disconnect it, press the small release tab on the connector and gently pull it out of its socket. Now, take the mileage blocker harness and perform the following connections:
- Plug the male connector from the blocker harness into the now-empty socket on the vehicle's module.
- Plug the original OEM connector you just removed into the female socket on the blocker harness.
You have now successfully inserted the blocker in-line with the vehicle's system. Ensure both connections click securely into place.
Step 3: Securing the Module and Reassembly
Before re-installing the primary module, find a suitable space within the dashboard to place the mileage blocker unit and its wiring. Tuck it away carefully, ensuring it is secure and will not rattle against other components while driving. Once the blocker is situated, gently slide the instrument cluster or BCM back into its original position. Re-fasten all screws, making sure they are snug but not overtightened. Finally, snap all the dashboard trim pieces back into place, working in the reverse order of removal.
Post-Installation: Activating, Testing, and Using Your Device
The physical connection of the module is a critical step, but the process of how to install mileage blocker technology is not complete until you have verified its correct operation. This final phase ensures the device is properly integrated with your vehicle’s CAN-Bus system and is functioning as intended. Familiarizing yourself with its controls is essential for seamless use.
Our modules are designed for simplicity, using your vehicle's existing steering wheel or dashboard buttons for control. There are no extra switches or remotes to manage.
Reconnecting Power and Initial System Check
With the mileage blocker securely installed, it's time to restore power and perform a basic systems check. This ensures no underlying issues arose during installation.
- Reconnect the Battery: Securely reattach the negative terminal to your vehicle's battery post and tighten the clamp.
- Ignition On: Turn the key to the "ON" position (or press the start button without your foot on the brake) and observe the dashboard.
- Check for Warnings: Ensure no unexpected warning lights (e.g., Check Engine, ABS) are illuminated. The dashboard should perform its normal startup sequence.
- Verify Functions: Confirm that your infotainment system, climate controls, and digital gauges are all operating correctly.
Activating and Deactivating the Blocker
Activating your mileage blocker is straightforward. The device uses a specific button sequence, which is unique to your vehicle model to prevent accidental activation. Always refer to the instructions provided with your specific module.
To activate, start the engine. Then, press the designated button sequence. For example, you may need to press and hold the "OK" button on your steering wheel for 5 seconds. A confirmation signal, such as the hazard lights blinking twice, will indicate the blocker is now active. To return to normal mileage recording, simply repeat the exact same button sequence. The confirmation signal will blink once to show it is deactivated.
Testing and Cycling Through Modes
With the blocker active, you must confirm it is halting mileage registration. For testing or off-road use only, drive a short distance and observe the odometer. The mileage reading should not increase. Many of our premium modules offer multiple modes (e.g., stop mileage completely, record 10% of mileage, etc.). You can cycle through these modes by pressing a different button combination, allowing you to select the ideal setting for your specific testing needs. For detailed operational modes and control sequences, please consult your product manual or visit mileageblocker.com for support.
DIY vs. Professional Fitting: When to Call an Expert
Our mileage blockers are engineered with premium, plug-and-play connectors for a straightforward installation process. We provide detailed instructions to guide you through every step. However, the most critical factor in deciding between a DIY installation and professional fitting is your own comfort level and technical experience. There is no substitute for the peace of mind that comes from knowing the job was done correctly, and opting for an expert is a smart choice for many vehicle owners.
To help you decide, consider the following points. While this guide details how to install mileage blocker modules, the final decision should always prioritize the safety of your vehicle and your own confidence.
Choose DIY If You Are...
A self-installation can be a rewarding and cost-effective option if you meet certain criteria. You are a good candidate for a DIY fitting if you are:
- Comfortable working with basic hand tools and trim removal tools.
- Patient, methodical, and able to follow technical instructions precisely.
- Experienced with minor automotive modifications, wiring, or electronics.
Consider Our Professional Fitting Service If You...
For those who prefer a guaranteed result without the learning curve, our professional service is the ideal solution. We strongly recommend this option if you:
- Are not confident in removing dashboard panels or accessing vehicle electronics.
- Own a high-value, classic, or complex luxury vehicle with intricate systems.
- Lack the necessary tools, a well-lit workspace, or the time to complete the installation.
- Simply prefer a guaranteed, professional installation for ultimate peace of mind.
Booking a Professional Installation
We have established a trusted network of approved and vetted technicians who specialize in modern vehicle electronics. Our professional fitting service ensures your mileage blocker is installed correctly, discreetly, and functions exactly as intended. The process is simple: contact our support team to get a quote and schedule an appointment at your convenience. Our experts will handle everything, providing a seamless, hands-off experience.
Ready for a flawless installation? Learn more about our professional fitting service.
Your Installation: Final Steps to Unlocking Full Control
This guide has provided a complete roadmap for how to install mileage blocker devices. The key takeaways are clear: success depends on meticulous preparation, correctly identifying your vehicle’s connection point-be it the instrument cluster or CAN gateway-and following a precise, step-by-step process. While a DIY approach is often straightforward, recognizing when to consult an expert is crucial for protecting your vehicle's complex electronic systems intended for testing or off-road use.
To guarantee a seamless fit, starting with a premium-quality module is non-negotiable. Our devices are engineered for a simple, plug-and-play installation using genuine OEM connectors, eliminating any need for soldering. We support your project with detailed, vehicle-specific video guides that walk you through every step. For ultimate peace of mind, our professional fitting service is also available.
Ready to begin? Find the perfect mileage blocker for your vehicle and view installation guides. With the right components and knowledge, you are now fully equipped to complete the installation with confidence.
Frequently Asked Questions
Will installing a mileage blocker void my car's warranty?
Our mileage blockers are engineered to be completely untraceable. They do not require cutting any wires or making permanent modifications to your vehicle's electronic systems. Because the installation is a simple plug-and-play process using original connectors, you can remove the device at any time, restoring the car to its factory state. As no permanent changes are made to any ECU modules, the manufacturer's warranty should remain unaffected when the device is removed prior to a service visit.
Can I remove the mileage blocker easily once it's installed?
Absolutely. Removal is just as straightforward as the installation process. Our mileage blockers feature a plug-and-play design with premium quality, original-style connectors. To remove the device, you simply disconnect it from the vehicle's CAN-Bus system and reconnect the original plugs. No special tools are required, and the process leaves no digital or physical trace, restoring your vehicle's connections to their original factory condition in minutes.
What happens if I forget the button sequence to activate the device?
If you forget the specific button sequence for your vehicle model, the device will simply remain in its last state-either active or inactive. You can find the activation sequence in the detailed installation manual provided with your purchase. For immediate assistance, our technical team is available via email or WhatsApp to provide the correct combination. We offer lifetime support to ensure you can always operate your device correctly and efficiently for testing or off-road use.
Do I need any special software or computers to install the mileage blocker?
No special software or diagnostic computers are required for installation. Our mileage blockers are pre-programmed for your specific vehicle and are designed for a direct, plug-and-play connection. The entire process is physical; you only need basic trim removal tools to access the connection point behind the instrument cluster. The device works independently without any need for software configuration or ECU programming on your part, making for a simple and secure installation.
What is the most common mistake people make during a DIY installation?
The most common mistake when learning how to install mileage blocker modules is failing to disconnect the vehicle's battery before starting. This can trigger fault codes or even leave the vehicle in a non-starting state, requiring assistance from a service like Ibrahim Road Rescue LLC to get it to a specialist. Another frequent error is applying excessive force to the connectors, potentially damaging the pins. Our genuine automotive-grade connectors are designed for a perfect fit, so they should click into place smoothly. Always follow the step-by-step guide to ensure a flawless installation.
Is the mileage blocker visible after installation?
No, the mileage blocker is completely concealed after a proper installation. The compact module is designed to be installed behind the instrument cluster or dashboard panels, making it entirely invisible from the cabin. This discreet placement ensures that the vehicle's interior remains aesthetically unchanged and that the device's presence is not apparent during visual inspections. Its covert nature is a key feature of its premium design for off-road or testing purposes.
How do I know if I have connected the plugs correctly?
Our original-style connectors are designed to prevent incorrect installation. They will only fit in the correct orientation and will produce an audible "click" when securely seated. After completing the installation and reconnecting the battery, turn on the ignition. If the instrument cluster powers up and functions as normal, the connection is correct. If the display is blank or shows an error, it indicates that one of the plugs is not fully engaged.
About the author
MileageBlocker TeamThe MileageBlocker Technical Team covers vehicle electronics, CAN and CAN-FD systems, mileage blocker compatibility, installation and product developments.
View author profile →